Home
 My Teardrop
 Teardrop Photos
 Teardrop Links
 Contact Me


Recommended Reading:

Ken-Skill Cabinet Project

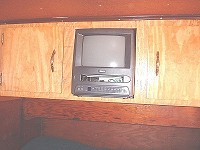
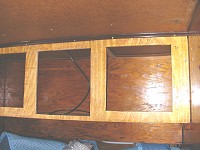
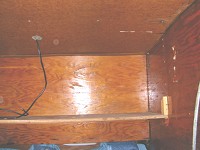
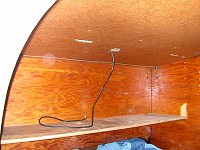
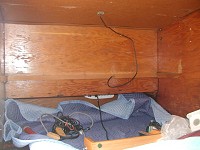
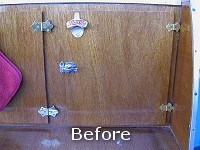
The previous owner of my Ken-Skill built a cabinet inside by adding a facing to the original shelf. This was done to house the TV. The wood and hardware they used did not match the rest of the inside and with the light stain it really stood out. It was very simple construction, basically a piece of plywood with three holes cut out of it with two covered with doors. It was not very secure. Fortunately they didn't drill a lot of holes into the trailer.

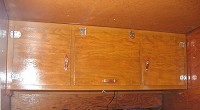
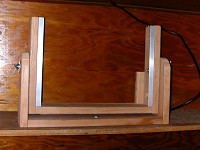
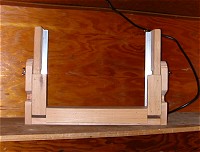
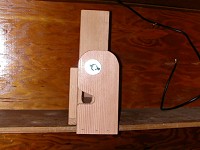
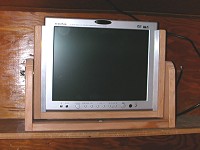
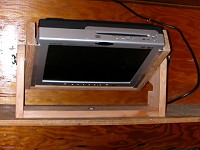
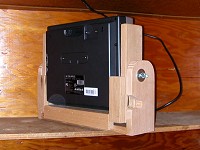
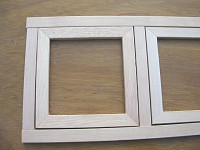
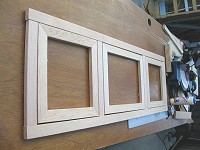
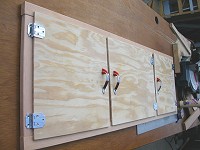
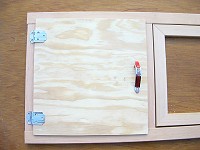
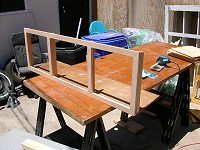
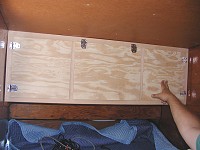
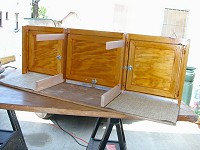
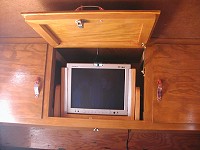
I built a new cabinet front with a face frame of straight-grain fir and doors made the way the originals were out of 1/4" plywood with a 1x2 reinforcing frames on the backs. There are three doors with the center one being wider than the other two to accommodate my new portable flat panel TV. It's an Audiovox D1210 AC/DC unit with built in DVD player, removable speakers and wireless headsets.

The finish on the cabinet took some experimentation to get a look I liked. I think I spent more money on stains and finishes than the rest of the cabinet. I had lots of sample wood to practice on. At first I was going to just use amber shellac since it is a traditional finish and very easy to use, but the color was not deep enough to match the rest of the interior. Next I got some water based stain in a good color. I used wood conditioner on the wood first as it was supposed to keep the stain from looking blotchy. It didn't work as advertised and not only made it blotchy and raised the grain on the wood a lot. I never even got to putting on the clear top coat. Time to hit the hardware store again.

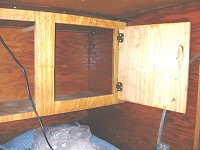
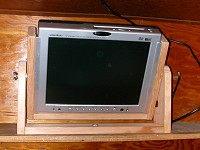
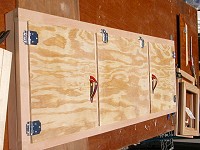
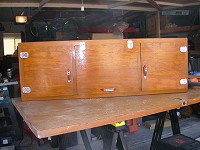
Next I got some oil-based gel stain since I knew for sure it would not make the wood blotchy. This stain was much easier to work with, the downside being that it takes a long time to dry. The color wasn't dark enough so it took two coats of stain. For the top coat, I ended up using the amber shellac after all. I put three coats on the outside and a couple coats on the unstained inside. it gives the wood a very nice glow.

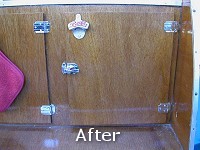
For hardware, I found vintage hinges and latches that would go with the existing hardware in the trailer. I couldn't find exact matches but the ones I found are great looking. Scroll down to the bottom of the page for more on the hardware.

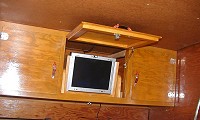
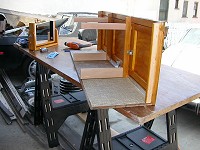
The new cabinet works great with the new TV and I'm very happy with the results. Below is the process of creating the cabinet.

Click here to return to the main Ken-Skill page.

Click on image for larger view.
BEFORE

Click on image for larger view.
AFTER

Click on images for larger views.


Here I'm removing the old cabinet framework and doors. The small block on each end of the shelf is the original support for the shelf front which looks like it would have been a 1/2" x 4" piece of lumber if I go by the shadows on each side.
Click on image for larger view. Click on image for larger view. Click on image for larger view. Click on image for larger view. Click on image for larger view.
In order to allow for the TV to be tilted for optimum viewing, I built this stand. It will also give access to the top-loading DVD drive. The TV just slides in. The notches in the side are to allow clearance for the coax and power cord. I will use a single thumb screw from underneath to secure it to the shelf. I won't be using the speakers that came with the unit while it's in the trailer. They just pop off, they aren't very powerful and the extra width would have required the middle cabinet door to be too wide. I will be using some powered computer speakers or the wireless headsets.
Click on image for larger view. Click on image for larger view. Click on image for larger view. Click on image for larger view. Click on image for larger view. Click on image for larger view. Click on image for larger view.
Here is all the material for the cabinet, all cut out and ready to assemble. The inner frames will go on the back of the doors for stiffening. I will hinge the center door from the top instead of from the side as shown below. This will look more symmetrical and also will prevent the door from blocking the TV or the door to the right. I will have to fabricate or buy a support to hold the door open. For the latch I will find a matching horizontal handle and modify it to have a pushbutton catch like the other ones. Problem is that someone on Ebay keeps outbidding me on these handles. I'll keep trying.

I'm going to assemble the face frame with pocket screws. It is a very strong joint and doesn't require clamping. I had to order the tools to do it though. I normally would have used a biscuit joiner for face frames. I will use the biscuit joiner for the frames that go on the back of the doors.

Click on image for larger view. Click on image for larger view. Click on image for larger view. Click on image for larger view.
Click on image for larger view.
Here the face frame is all assembled and ready for finish. The pocket screws worked ok. I probably need more practice using them. It was tricky on the ends because they tended to split the rails. I was able to glue and clamp any cracks and it seems to be fine and not visible when installed anyway. The vertical pieces on the back serve a couple purposes. The ones on the ends will be used to attach the frame to the sides of the trailer. The middle two will allow me to tie the face frame to the back wall of the trailer since there is nothing in the ceiling to attach to. I will also put dividers at the bottom to keep items from sliding from side to side.
Click on image for larger view. Click on image for larger view. Click on image for larger view. Click on image for larger view. Click on image for larger view.
Here is the finished cabinet ready to install in the trailer. The boards sticking off the back do a couple things. The lower ones will keep items from sliding side to side and the top ones will support the top of the frame since there is nothing to attach to in the ceiling. The handle on the center door is actually a drawer pull that I modified to use a push button latch from one of other door handles. Good thing I bought extras. It works well and gives a nice matching look.
Click on image for larger view. Click on image for larger view. Click on image for larger view.
Here is the cabinet installed showing how the TV looks in its custom bracket.
Click on image for larger view.
This is the hardware I have. The hinge at the top left and the cabinet catch to the right of it are the originals from the front closet. The hinge at lower left is one of the new ones I got for the new cabinet. I have been unable to find ones that match the originals exactly. The screw hole pattern is the same so if I do find some matching ones I can replace them. The original hinges were modified to use a 1/4" thick door instead of 3/8". They basically flattened out the cabinet side of the hinge. I will do the same.

The pushbutton latch at the lower right is what I will be using on the two side doors while the center door will have a matching horizontal pull. While they don't match the originals, they are appropriate vintage parts and will look good and match the hinges.

Click on image for larger view.

While I'm working on the interior cabinet, I'm able to correct the hinge problem in the kitchen. The original hinges are long gone and the fronts of the cabinets and drawers have had a layer of mahogany plywood added over them and they used some flat brass hinges. Since the hinges were flat, they had to add spacers behind them on the cabinet side. They didn't support the doors very well and just plain looked bad. So I changed out the hinges with the same ones I'm using on the inside. They are the correct offset and look and function way better.
Click on image for larger view. Click on image for larger view.
Copyright © , Nick's Garage, all rights reserved.
Click here to return to the top of the page.